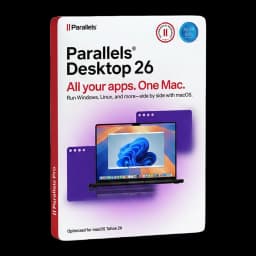








































Do you need to run Windows-only software on your Mac without the hassle? If you’ve purchased Parallels Desktop and a Windows licence from Licensgo, you’ll receive everything by email and can start right away. In this guide we show you how to install Windows 11 on Mac, both Intel and Apple Silicon (M1/M2/M3), step by step: choosing the edition, creating the VM, setting CPU/RAM/disk, Parallels Tools, file/device sharing, optimisations and quick fixes.
1What you need first
On Apple Silicon (M1/M2/M3) you use Windows 11 on Arm; on Intel Macs you use the standard Windows 11 ISO. You’ll need a stable connection, at least 64 GB free on your SSD (100–150 GB is better) and administrator rights on macOS. For activation, keep your Windows code handy (e.g. a Microsoft Windows 11 Professional licence).
If you still need a code, you can purchase a Microsoft Windows 11 Professional licence. Not sure which type of licence to choose? See our comparison OEM vs Retail: Windows 11 Pro, which licence to buy.
- a Mac with Intel or Apple Silicon and up-to-date macOS;
- Parallels Desktop installed and enough SSD space;
- Windows 11 ISO (Intel) or automatic image (Apple Silicon);
- a valid Windows 11 Home/Pro product key.
On Licensgo you can purchase Windows 11 Home/Pro and Parallels Desktop with immediate delivery by email, assistenza and an invoice for businesses and professionals.
2Choose your Parallels edition
For everyday use (Office, browser, business apps) start with Parallels Desktop 26 for Mac Standard. It’s simple, fast and supports Windows 11 on Intel and Apple Silicon.
If you develop software, handle heavier workloads or need advanced networking and more vCPU/RAM, choose Parallels Desktop 26 Pro for Mac. You can upgrade to Pro later without reinstalling Windows.
3Step 1 — Create the Windows 11 VM
Open Parallels Desktop and click ‘Install Windows’. On Apple Silicon, Parallels automatically downloads Windows 11 on Arm; on Intel, select the Windows 11 ISO. Follow the wizard, choose the VM name and location, and keep ‘Shared Network’ to get started quickly.
Before the first boot, open Machine Configuration > Hardware and add a virtual TPM if missing. In ‘Security’, make sure ‘Secure Boot’ is enabled. These are Windows 11 requirements and prevent installation errors.
Tip: after the initial setup, create a snapshot so you can roll back if needed. For broader strategies, see our guide to practical backups.
4Step 2 — Set CPU, RAM and disk
With the VM shut down, go to Configuration > Hardware > CPU & Memory and to Hard Disk. Assign resources based on your Mac and workload. Leave headroom for macOS to stay smooth.
Rule of thumb: light office use with 2–4 vCPU and 4–8 GB RAM; development or CAD with 4–8 vCPU and 8–16 GB RAM. Set the disk to at least 64 GB (100–150 GB is better) and keep it as a dynamically expanding SSD image.
To track resource usage over time and fine-tune allocations, see our guide to monitor CPU, RAM and disk.
- start with moderate values, then increase if you notice persistent bottlenecks;
- leave at least 4 CPU cores and 8 GB RAM to macOS on Apple Silicon;
- enable TRIM/SSD optimisations and automatic disk growth.
5Step 3 — Parallels Tools, sharing and peripherals
After Windows starts, install Parallels Tools from the menu. It adds optimised drivers, mouse/keyboard integration, time synchronisation, copy-paste, drag & drop and snappier graphics.
Configure file sharing in ‘Options > Sharing’ to map your Mac folders (Desktop, Documents, Downloads) inside Windows. Use Coherence mode if you want Windows apps alongside macOS ones.
For USB devices, set ‘Preferences > Devices’ to ‘Ask me what to do’ so you can choose macOS or Windows on connect. Printers and cameras are exposed via Parallels Tools; switch to direct USB passthrough only when needed.
6Optimise performance and battery
In ‘VM Options > Optimisation’ choose a profile: Productivity for general use, Games for more graphics-heavy apps. Enable 3D acceleration when available and set a balanced display resolution and scaling.
Inside Windows: set ‘Best performance’ when on charge and ‘Balanced’ on battery; disable unneeded startup apps and background tasks. A lean Windows helps—see our tips for cleaning and optimising your PC without reinstalling Windows.
7Common errors and quick fixes
TPM/Secure Boot required: add a virtual TPM in ‘Hardware’ and enable Secure Boot in ‘Security’. Network issues: switch between ‘Shared Network’ and ‘Bridged’; if the VM has no IP, remove and re-add the network adapter and restart Windows.
Activation: enter your code in ‘Settings > System > Activation’ and sign in with a Microsoft account if prompted. For many users we recommend Windows 11 Pro for management features; alternatively, Windows 11 Home is also fine.
Out of space: expand the virtual disk in ‘Hardware > Hard Disk’ and use Disk Management in Windows to extend the partition. USB not recognised: set device connection to ‘Ask’ and connect the peripheral to Windows from the toolbar.
‘Shared Network’ is the simplest and works behind most firewalls. Use ‘Bridged’ only if the VM must appear as a separate device on the LAN.